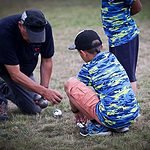
When it comes to painting washers for washer toss, getting the perfect finish might seem like an insurmountable task, but fear not, with the right techniques, you can achieve professional-looking results with ease.
From choosing the ideal paint type to adding your personal touch with designs, each step plays a crucial role in creating washers that not only look great but also withstand the rigors of gameplay.
Ready to elevate your washer toss game to the next level? Let's plunge into the world of washer painting and discover the secrets to success.
Choosing the Right Washers
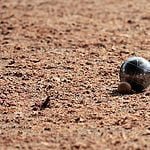
When selecting washers for painting in preparation for Washer Toss, opt for galvanized or zinc-plated options for enhanced durability and resistance to corrosion. These types of washers are ideal for withstanding outdoor conditions and the wear and tear of gameplay. To make the most of your washer painting experience, make sure that the washers have a smooth surface. This smoothness will promote better paint adhesion, resulting in a cleaner and more professional-looking finish.
When choosing washers for the game, consider selecting ones with a large center hole. This feature not only makes them easier to handle but also enhances visibility during gameplay, allowing players to aim more accurately. Additionally, make sure to pick washers of the appropriate size and weight to comply with game regulations and specifications. Inspect the washers carefully for any defects or irregularities that could impact the painting process or the performance of the game. By paying attention to these details, you can set yourself up for a successful Washer Toss experience.
Preparing the Washers for Painting
For best paint adhesion and durability when preparing washers for painting, consider grit blasting the surfaces before priming. This step helps remove any debris, rust, or existing coatings, providing a clean surface for the paint to adhere to properly.
Here are some essential steps to prepare your washers for painting:
- Clean the Washers: Start by cleaning the washers thoroughly with a degreaser or soap and water to remove any dirt, grease, or grime that could hinder paint adhesion.
- Grit Blast the Surfaces: Use a grit blasting tool to roughen the surface of the washers. This process improves the mechanical adhesion of the paint to the metal, ensuring a longer-lasting finish.
- Apply a Primer: After grit blasting, apply a primer suitable for metal surfaces. Priming is vital for galvanized or zinc-plated washers as it promotes better adhesion and enhances the durability of the paint finish.
- Consider a Self-Etching Primer: For galvanized surfaces, consider using a self-etching primer specifically designed for these materials. This type of primer chemically bonds to the metal, providing excellent adhesion for the paint.
Properly preparing your washers for painting is essential to guarantee a professional-looking finish that can withstand the rigors of the washer toss game.
Selecting the Paint Colors
To guarantee the visual appeal and functionality of your painted washers for washer toss, carefully select paint colors that not only stand out during gameplay but also complement the overall aesthetics of your setup. When choosing the paint colors, consider using fluorescent options to improve visibility on the playing field. Additionally, opt for contrasting colors to differentiate between teams or players effectively. To make sure a long-lasting finish, it is recommended to go for durable paint options such as two-part epoxy. Experimenting with metallic or glitter paints can also add a unique and eye-catching touch to your washers. Remember to select colors that not only enhance gameplay but also harmonize with the overall look of your washer toss game setup.
| Fluorescent Colors | Contrasting Colors | Durable Paint Options | Metallic & Glitter Paints | Complementary Aesthetics |
|---|---|---|---|---|
| Bright and vibrant | Stand out against each other | Long-lasting finish | Unique and eye-catching | Harmonize with setup |
Applying the Base Coat
To begin applying the base coat, choose the appropriate color that will enhance the final look of your painted washers.
Using smooth and even strokes, make sure complete coverage of the washers with the primer.
This step is important as it sets the foundation for the paint color to adhere and provide a durable finish for your washer toss game.
Choose Base Coat Color
Consider selecting a base coat color that offers strong contrast to your final choice to guarantee maximum visibility during gameplay. The base coat sets the stage for the overall appearance of your painted washers, enhancing their aesthetic appeal during the washer toss game.
To make sure a successful base coat application, follow these key steps:
- Choose a base coat color that contrasts well with your final color selection.
- Apply the base coat evenly to create a smooth and consistent foundation.
- Use a primer designed for metal washers to improve paint adhesion and durability.
- Allow the base coat to dry completely before adding additional coats or designs.
Apply Smooth, Even Strokes
Apply the base coat using smooth and even strokes for uniform coverage on the washers. Utilize back-and-forth motions while painting to prevent drips and achieve a polished outcome.
It's important to let the base coat dry completely before adding more coats to make sure a vibrant and long-lasting color. Consider using a primer specially formulated for metal surfaces to enhance paint adhesion and durability.
Applying light coats of paint will help avoid drips and runs, resulting in a flawless finish on the washers. By following these steps diligently, you'll create beautifully painted washers ready for countless rounds of washer toss play.
Remember to make sure to drill pilot holes before painting for smooth gameplay.
Adding Designs or Patterns
When adding designs or patterns to your painted washers, consider using stencils or painter's tape for precise geometric shapes.
Experiment with various colors and layering techniques to create depth and dimension in your designs.
Don't hesitate to try different painting methods like sponging, splattering, or fine-tip paint pens for a truly unique and artistic finish.
Designing Techniques
To enhance your painted washers for washer toss, utilize stencils to incorporate intricate designs or patterns, providing a personalized touch. When designing your washers, consider the following techniques:
- Tape Off Sections: Use PVC tape to section off parts of the washer before painting to create geometric or striped patterns easily.
- Experiment with Colors: Explore different color combinations and techniques like ombre or splatter effects for unique designs.
- Fine-Tipped Tools: Utilize fine-tipped brushes or markers for detailed patterns on the painted washers.
- Vinyl Decals: Consider using vinyl decals or stickers for precise and polished designs on the painted washers.
Pattern Selection
For selecting patterns to add designs or patterns to your painted washers for washer toss, consider the intricacy and personalization options stencils or freehand painting can offer.
To create geometric patterns, use painter's tape to mask off sections, allowing for clean lines and shapes. Experiment with different colors such as bold primaries or soothing pastels to achieve various effects like ombre or splatter.
For a touch of glamour, try metallic paints that shimmer under the sun, or add a touch of sparkle with glitter paints for a unique finish. Personalize your washers further by incorporating initials, symbols, or team logos to make them stand out on the playing field.
Sealing the Painted Washers
Wondering how to effectively seal your painted washers to guarantee their longevity and vibrant appearance? Follow these steps to seal your painted washers properly:
- Clear Coat Spray: Use a clear coat spray to provide a protective layer that helps prevent chipping and fading of the paint on the washers.
- Polyurethane Sealant: Apply a polyurethane sealant over the painted surface for a durable and glossy finish that enhances the colors and provides long-lasting protection.
- Acrylic Sealer: Consider using an acrylic sealer for its quick-drying and water-resistant properties, which can help maintain the vibrancy of the painted washers.
- Clear Enamel: Opt for a spray-on clear enamel to seal the painted washers effectively while adding a glossy protective layer that enhances the overall appearance and durability.
Conclusion
Now that you've learned how to paint washers for washer toss, it's time to put your skills to the test and enjoy the colorful and customized washers in your games.
Experiment with different colors and designs to make your washers stand out on the playing field.
Remember to take care of your painted washers to make certain they last for many games to come.
Have fun and happy tossing!