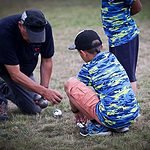
Crafting a disc golf basket is like putting together a puzzle; each piece fits perfectly to create a functional and challenging target for your game.
But, have you ever considered the intricacies of designing a disc golf basket that not only meets regulations but also stands the test of time?
Let's explore the step-by-step process of constructing a durable and professional-grade disc golf basket that will elevate your playing experience to a whole new level.
Key Takeaways
- Shape steel bars and conduit for frame and legs.
- Attach chains for disc-catching mechanism.
- Secure pole with concrete for stability.
- Customize and maintain with paint and regular checks.
Materials Needed for DIY Disc Golf Basket
To craft your own DIY disc golf basket, gather the following essential materials:
- Steel bars: provide the structure needed for the basket.
- Flat steel: used in conjunction with the steel bars for added stability.
- Conduit bender: crucial for shaping the metal conduit that forms the basket's frame.
- Metal conduit: forms the primary structure of the basket.
- Enamel black fence post: serves as the solid base for the entire construction.
- Coil chain: used to hang down from the basket to catch the disc.
- Duct clamps, hose clamp, allied tube, post cap: additional materials for securing and enhancing the basket's construction.
- Net/paracord: essential for completing the basket and ensuring the disc lands safely.
With these materials in hand, you're ready to embark on the exciting journey of creating your very own disc golf basket, tailored to your preferences and needs.
Preparing the Frame for the Basket
Crafting the frame for your DIY disc golf basket involves shaping metal conduit with a conduit bender, welding steel bars together to form the baskets, and securely attaching the chains for optimal disc-catching functionality. To create a sturdy frame, use steel bars and flat steel to build the center post. Use a conduit bender to shape the metal conduit for the legs of the basket. Weld round and flat steel bars together to construct the baskets. Ensure that the chains are attached securely to the basket to guarantee proper disc-catching functionality. Finally, add a net to the lower basket to complete the disc golf basket frame for practice and play.
| Materials Needed | Description |
|---|---|
| Steel Bars | Create the center post |
| Metal Conduit | Shape legs of the basket |
| Weld | Join steel bars together |
| Chains | Attach securely for catching discs |
| Net | Add to lower basket |
Attaching the Chains to the Basket
Attach the chains to the basket's top ring, ensuring they hang down to create the essential catching mechanism for discs. Proper chain placement is crucial for optimizing the basket's catching ability. Remember, the chain length matters; each chain should be a minimum of 9 inches long to effectively catch discs and provide a satisfying gameplay experience. For baskets seeking PDGA approval, having a minimum of 12 chains is recommended to enhance catching consistency and overall performance.
When attaching the chains, make sure they're evenly spaced around the basket's circumference to ensure uniform catching coverage. The quality and quantity of chains directly impact the basket's ability to catch discs reliably, making it a critical component to get right. By following these guidelines and paying attention to chain placement and length, you can create a professional-grade disc golf basket that meets PDGA standards and provides an enjoyable playing experience for disc golf enthusiasts of all levels.
Securing the Pole in Place
Ensuring the pole stands securely is paramount for the structural integrity and performance of your homemade disc golf basket. Begin by digging a hole at least 18 inches deep using a post hole digger. This depth will provide the necessary stability for the pole.
Once the hole is ready, carefully place the pole in the center and fill the hole with concrete mix. Make sure the pole is perfectly vertical by using a level before the concrete sets. This step is crucial in guaranteeing the basket stands straight and true.
The concrete mix won't only secure the pole in place but also prevent any shifting over time. Allow the concrete to cure for a minimum of 24 hours before proceeding to attach the basket. Taking the time to properly secure the pole will ensure the overall stability and longevity of your disc golf basket.
Adding the Catching Device
Looking to elevate your disc golf game to the next level with a reliable catching device that ensures every throw is met with precision and accuracy? The catching device on a disc golf basket is a crucial component that can make or break your game.
Here's how you can add the perfect catching device to your basket:
- Lower Basket Construction: The lower basket should be sturdy and well-constructed to withstand the impact of discs hitting it. Ensure it's durable and securely attached to the rest of the basket structure.
- Proper Height: The catching device must adhere to PDGA regulations, with the bottom of the chain assembly being at least 22 inches from the ground. This height ensures that discs are caught effectively without bouncing out.
- Retention Mechanism: Consider adding a net or paracord at the bottom of the lower basket to prevent discs from falling out after being caught. This additional feature can enhance the functionality of your catching device and improve your overall playing experience.
Finishing Touches on the Basket
For a professional and polished finish on your disc golf basket, consider applying a coat of enamel black paint to enhance durability and weather resistance. This step not only adds a sleek look but also protects your basket from the elements. To ensure all components are securely attached, use duct clamps and hose clamps. These tools provide the sturdiness needed for a reliable disc golf basket. Adding a post cap to the top of the basket gives it a refined appearance, making it look like a pro-level basket. For a finishing touch, consider using a Dremel tool to smooth out any rough edges or imperfections. By paying attention to these details, you'll create a basket that not only functions well but also looks great on the disc golf course.
| Tools Needed | Purpose |
|---|---|
| Duct Clamps | Secure attachment |
| Hose Clamps | Sturdiness |
| Post Cap | Professional finish |
| Dremel Tool | Smooth out edges |
| Enamel Paint | Durability |
Testing and Adjusting the Basket
To truly put your disc golf basket to the test, engage in thorough experimentation by throwing discs from various distances and angles to guarantee optimal catching performance.
Here are some key steps to testing and adjusting your basket for the best results:
- Fine-Tuning Throw Distances: Experiment with different distances to ensure the basket effectively catches discs thrown with varying strengths.
- Adjusting Chain Length: Make adjustments to the chains if needed to reduce spit-outs or bounce-outs, providing a more reliable catching experience.
- Verifying Regulation Height: Check that the basket's height complies with the standards set for disc golf play, ensuring fair and consistent gameplay.
Painting or Customizing the Basket
When customizing your disc golf basket, unleash your creativity with durable outdoor paint to add a personal touch that sets it apart on the course. Using outdoor paint designed for metal surfaces ensures longevity and protection from the elements, keeping your customized basket looking vibrant. Consider incorporating stencils, decals, or team logos for a professional and polished appearance that showcases your style. Bright colors and unique designs not only make the basket more visible during gameplay but also add a fun element to the course for players.
To help you get started on your DIY customization journey, here's a handy table outlining some ideas and tips for painting or customizing your disc golf basket:
| Tips for Customizing Your Disc Golf Basket | |
|---|---|
| Use durable outdoor paint | Consider stencils or decals |
| Incorporate team logos for a polished look | Opt for bright colors for visibility |
| Regular maintenance for longevity | Add unique designs for flair |
With these suggestions, you can elevate your disc golf basket to a whole new level of creativity and personalization.
Setting Up Multiple Baskets for a Course
Setting up multiple baskets for a disc golf course allows players to enjoy a dynamic and challenging playing experience. When building your backyard disc golf course, incorporating DIY disc golf baskets can be a fun and rewarding project. The materials are inexpensive, and with step-by-step instructions, you can create a course that will keep you and your friends entertained for hours. Here are some tips to consider when setting up multiple baskets:
- Varying Distances: Place the baskets at different distances from the tee pads to test players' throwing skills and add excitement to the game.
- Diverse Angles: Set up the baskets at various angles relative to the tee pads to challenge players' ability to curve their throws and navigate obstacles effectively.
- Skill Levels: Create multiple basket configurations that cater to different skill levels, from beginner to advanced, ensuring that everyone can enjoy the course and improve their game.
Maintenance Tips for Your Disc Golf Basket
Ensure peak performance and longevity for your DIY frisbee golf basket by following these essential maintenance tips. Regularly inspect the chains and connections for any signs of wear or damage to keep the basket stable during play.
A quick clean with a mild soap and water solution will remove dirt, debris, and disc residue that could affect performance. Verify the height adjustment mechanism's security and functionality for consistent play.
Don't forget to lubricate moving parts like chain connectors to prevent rust and ensure smooth movement upon disc impacts. When not in use, store your homemade disc golf basket indoors or shield it with a weatherproof cover to shield it from harsh elements and extend its lifespan.
These easy-to-make baskets deserve some care to keep them in top shape for your portable disc golf enjoyment.