You might think that building a bocce court requires complex construction skills, but in reality, it's quite a straightforward process.
From choosing the right location to installing the final layer, each step plays a crucial role in creating a durable and enjoyable playing surface.
As you navigate through the planning and construction stages, you'll discover essential tips and techniques that can elevate your bocce court from good to exceptional.
Key Takeaways
- Choose a well-drained location with standard dimensions.
- Prepare materials, clear area, and mark court corners accurately.
- Construct a sturdy frame and layer gravel, granite, and shells.
- Maintain with oyster shell, deck sealer, and regular cleaning for longevity.
Choose the Right Location
When selecting the ideal location for your bocce court, prioritize good drainage to prevent water accumulation on the playing surface. This is crucial to ensure that your court remains playable and in good condition. It's recommended to choose a spot that can accommodate the standard court dimensions of 13×91 ft (4×28 m). Adjustments can be made to the size based on available space, but it's important to maintain a width to length ratio between 1:5 and 1:7 for optimal gameplay.
Evaluate the location for potential water-prone areas, as installing a French drain may be necessary to enhance the court's drainage capabilities. To establish the boundaries effectively, mark the court corners accurately with paint and stakes. This not only adds a professional touch to your bocce court but also helps players understand the court's layout clearly. Properly marked corners contribute to the overall aesthetic appeal of the playing area and improve the overall bocce experience.
Gather Necessary Materials
To gather the necessary materials for building your bocce court, start by sourcing pressure-treated lumber for the border as a recommended option. This will provide durability and longevity to your court. Here are the essential materials you'll need:
- Pressure-Treated Lumber: Ideal for constructing a sturdy wooden border that defines the bocce court area.
- Crushed Oyster Shell or Limestone: Consider using these materials for the top playing surface to create a smooth and level playing field.
- Stone Drainage Layer: Necessary for proper water drainage to prevent water accumulation on the court.
- Landscape Fabric: Use this weed barrier to inhibit unwanted plant growth within the court area, ensuring a clean and well-maintained playing surface.
Determine Court Dimensions
For determining the court dimensions of your bocce court, consider the standard measurements of 13 feet wide by 91 feet long as a starting point for your layout. The court size can be adjusted slightly to fit the available space while maintaining a width to length ratio between 1:5 and 1:7 for optimal gameplay. It's crucial to measure the length and width precisely to ensure the accurate placement of stakes and the proper layout of the playing area.
Accurate measurements will play a key role in the construction process, guiding you in marking the court corners and outlining the boundaries effectively. By determining the court dimensions beforehand, you'll streamline the construction process, ensuring that the bocce court fits seamlessly into the designated space and meets your desired specifications. Take the time to measure meticulously to set the foundation for a well-crafted bocce court that will provide hours of enjoyment for years to come.
Mark Court Corners
Utilize paint and stakes to accurately mark the corners of your bocce court, ensuring precision in defining the boundaries for a well-crafted playing area. When marking the corners of your bocce court, follow these steps for a successful construction process:
- Use Paint: Begin by marking the corners with paint on the ground to visualize the layout clearly.
- Drive Stakes: Drive wooden stakes into the ground at each corner of the court to establish the court's perimeter.
- Tie Strings: Connect the stakes with strings to create straight lines and precise angles, outlining the bocce court boundaries accurately.
- Ensure Visibility: Opt for brightly colored paint and durable stakes to ensure the corner marks remain visible throughout the construction phase.
Install Corner Posts
When installing corner posts for your bocce court, ensure the wooden 4×4 posts are firmly anchored into the ground to provide structural stability and support. These corner posts are vital for the construction of your bocce court, as they serve as the foundation for the entire playing area. Proper alignment of the corner posts is crucial to maintain the dimensions and shape of the court accurately.
To install the corner posts, dig holes at each corner of the court where the posts will be placed. The depth of the holes should be at least two feet to ensure stability. Place the wooden 4×4 posts vertically into the holes and backfill them with concrete for added support. Use a level to check that the posts are perfectly vertical and aligned with each other.
Well-anchored corner posts guarantee that your bocce court will withstand the rigors of play and remain structurally sound for years to come. Additionally, they contribute to the overall aesthetic appeal of the court, providing a polished and professional finish to your construction project.
Add Optional French Drain
To further enhance the functionality and aesthetics of your bocce court, consider integrating an optional French drain system. Here are four key points to guide you in adding this beneficial feature:
- Preventing Water Buildup: A French drain effectively directs water away from the playing surface, minimizing the risk of water accumulation that can affect gameplay and the court's longevity.
- Perforated Pipe Design: The core of a French drain is a perforated pipe that allows water to enter and flow out. This design efficiently manages excess water, keeping your bocce court dry and playable.
- Use of Gravel: Surrounding the perforated pipe with gravel or rock facilitates water infiltration and drainage. The gravel acts as a filter, preventing clogs and ensuring smooth water flow.
- Enhancing Court Performance: Installing a French drain is a recommended step, particularly in wet or water-prone areas, to maintain the integrity and performance of your bocce court over time. Proper installation involves digging a trench, laying the pipe, covering it with gravel, and ensuring a suitable slope for effective water drainage.
Build Court Frame
For a sturdy and defined boundary that enhances both functionality and aesthetics, construct the bocce court frame using pressure-treated 4×4 boards secured firmly with spikes. The frame serves as the backbone of the court, providing structure and clearly marking the boundaries for gameplay. Proper construction of the frame is essential to maintain the shape and integrity of the court over time. Follow the steps below to build the court frame:
| Step | Description | Tools Required |
|---|---|---|
| Measure and Layout | Determine the dimensions of your court and mark the layout | Tape Measure, Marking Tools |
| Cut Boards | Cut the pressure-treated 4×4 boards to the required lengths | Saw |
| Secure Boards | Place the boards along the layout and secure them with spikes | Hammer, Spikes |
Install Gravel Base
For a stable and well-prepped bocce court foundation, ensure you compact the gravel base thoroughly to guarantee stability and proper drainage. Here are four essential steps to install the gravel base effectively:
- Selecting the Right Gravel: Choose a high-quality, durable gravel material that's suitable for drainage and compaction.
- Even Distribution: Spread the gravel evenly across the court area to ensure a consistent base thickness.
- Compaction Process: Use a mechanical compactor to compact the gravel layer firmly. Compact in layers to achieve the desired stability.
- Checking for Stability: After compaction, walk over the gravel base to check for any soft spots or uneven areas. Make necessary adjustments for a solid foundation.
Properly compacted gravel base is crucial for the stability and longevity of your bocce court. By following these steps diligently, you'll create a reliable foundation that will support the playing surface and enhance the overall performance of your court.
Layer Crushed Surface
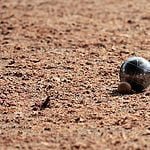
Layer the crushed surface of the bocce court by shoveling in decomposed granite to create a stable base for the playing area. Compact the gravel layer evenly with a tamper before applying a weed barrier to prevent weed growth in the playing surface. Add a 2- to 3-inch layer of decomposed granite on top of the gravel, ensuring it is spread evenly across the court. For the final playing surface, top it with a 2-inch layer of sand or crushed oyster shells to provide a smooth and level area for playing bocce.
To understand the layering process better, refer to the table below:
| Layer | Material |
|---|---|
| Base Layer | Large gravel for drainage |
| Second Layer | Decomposed granite |
| Top Layer | Sand or crushed oyster shells |
| Additional Layer | Weed barrier |
Maintain Your Bocce Court
To maintain your bocce court in top condition, regularly rake and roll the court surface for a smooth and level playing area. Here are four essential maintenance tips to ensure your bocce court remains in excellent shape:
- Add Crushed Oyster Shell: Periodically incorporating crushed oyster shell onto the court surface helps maintain its quality, providing a consistent playing experience for you and your guests.
- Apply Deck Sealer: Every couple of years, use a deck sealer to protect the wooden borders of your bocce court from weather damage, ensuring their longevity and preserving the overall look of the court.
- Use a Screed Tool: Utilize a screed tool for leveling the layers of gravel, decomposed granite, and sand on your court. This tool helps achieve a perfectly even surface for optimal bocce ball rolling.
- Keep the Court Clean: Regularly remove debris from the court to create a clean and safe playing environment, enhancing the overall aesthetic appeal and functionality of your bocce court.